
So many publishers are not including amazing videos on their websites because they just don’t know how. Video is easy to use, and can be a powerful addition to any website. We’re going to take you step by step through the process with some screenshots and tips for how to add video on all of the major platforms.
Use a Content Delivery Network
Unless you have an in-house web developer who is ready and willing to tackle hosting it on your own servers, use a content delivery network. You’re already familiar with at least one: YouTube. Your video, and all of its data, lives there. It doesn’t eat up your bandwidth or bog down your site. The video creator you’re working with probably already uses one and likely already has the video you want to use ready to share.
We can debate all day long which is the best one to use, but much of this is personal preference. For the purposes of this article, we’ll use Vimeo and YouTube for demonstration since those are the most popular. If a content creator has shared a video with you for publication purposes, it’s totally fine to insert that video from their Vimeo or YouTube account. If they’re sharing from a different source or didn’t share a link, just send them an email. They’ll be happy to get that for you.
If they haven’t already given you permission to embed their video, it’s common courtesy to send them an email and ask. Of course, you should always credit and link creators when using their work on your website (unless you’ve paid for a promotional video of your own, in which case, abide by the terms of your agreement, which may allow publishing without attribution).
Adding Video on WordPress
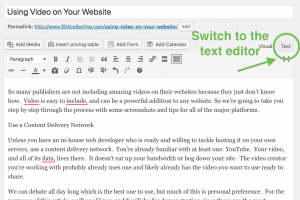
WordPress makes it super easy to add video. You can simply copy the link to the video, paste it into your editing window, and WordPress will embed the thing.
If you would like to use the embed code (the video creator may request it, or you may prefer the clean look that a custom embed code can provide), the process is almost as easy. See the directions below for locating that embed code. Then simply click over to the text editor in your editing window, find where you would like to place your video, and paste that code in there.
Switch back to your visual editor and finish your post. Just like with images, you can click on the video to set your text wrap and right/left justify options.
Pro-Tip: Even adding videos can affect your site speed by means of server requests. Each video you embed sends several requests to the server it’s hosted on to load the video on your page. For one video, you’re not likely to notice a difference. If you’re sharing videos on a regular basis (like we do) you may want to use a plugin for something called lazy load. It loads a thumbnail in place of your video super fast, then loads each video as the user clicks the play button. The one I’m using is Lazy Load by Kevin Weber.
Videos with advertising generally require more HTTP requests, so another option when you have the choice, use videos without additional advertisements or monetization.
Adding Video on Squarespace
Since I use WordPress, I reached out to a few other video creators who use other platforms for their websites. Tara Garwood of Banner Day Films was kind enough to put together the following tutorial on adding video to your Squarespace site.
It’s fairly simple to add a video to your Squarespace site. Squarespace does not support hosting your video on their platform, but you can embed videos that are hosted on YouTube, Vimeo, Animoto, and Wistia. There are advanced methods that allow for more customization, but for now, we’ll concentrate on the simplest way to get your new video live!
Adding the video
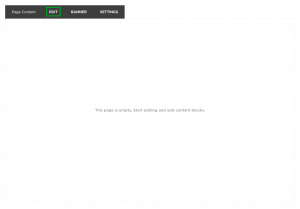
Once you’ve signed into the Squarespace web editor and navigated to the page you want to add the video to, hover your mouse over the main area of the page a choose “EDIT” on the bar that pops up.
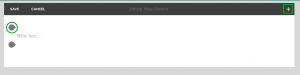
Click on the plus button in the upper right corner of the main content area or move your mouse down the left side of that area and click on an Insert Point (the handle that appears when you hover over the area where you want to add your video).
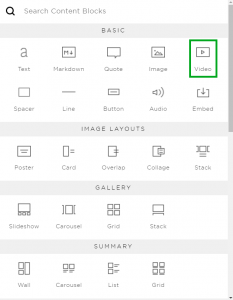
In the Content Block Menu, choose “Video”.
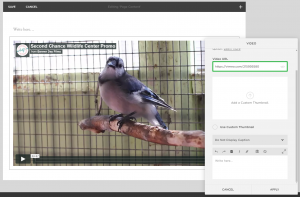
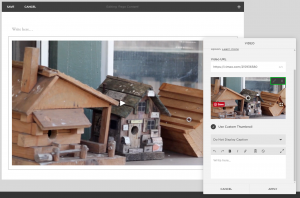
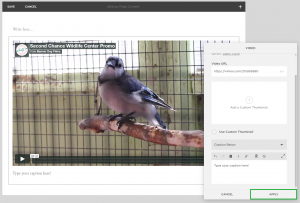
Now we’re cookin’! In the Video Block Editor, enter the link for your video in the “Video URL” field. (You can get the URL by going to your video on the web and copying the link of that page.) Your video will appear on the page. Bonus! You can also add a YouTube playlist. Just go to the playlist page, right-click on the “Play All” button, and select “Copy link address” from the drop-down menu.
If you’re happy with the thumbnail for your video and don’t want a caption to appear below it, you’re all set! Click “Apply” and your video has a cozy new home on your website! (Don’t forget to also click “Save” in the upper left corner of the main content area once you’ve finished editing your web page!)
Adding a Custom Thumbnail
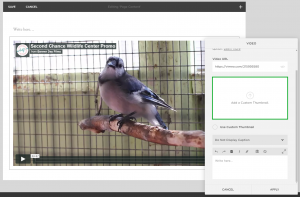
If you’d like to choose a different image to use as a thumbnail, click on “Add a Custom Thumbnail” and a file window will open.
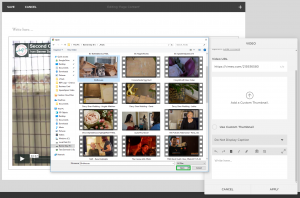
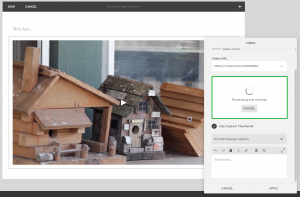
Navigate to the image you’d like to use as a thumbnail, select it and click “Open” in the file window. (You can also just drag an image over to the “Add a Custom Thumbnail” Box and drop it there.) This will change the image that shows in the video player until the video is played. It may take a minute or two for the image to be processed. This will be in indicated by a loading graphic and the words “Processing and resizing” in the “Add a Custom Thumbnail” Box.
Squarespace also offers options for editing your custom thumbnail. When you hover your mouse over the thumbnail view in the Video Block, you’ll see a Pinterest button (which allows you to save your thumbnail image to—you guessed it—Pinterest) and a grey rectangle in the upper right corner. To remove your custom thumbnail, click on the trash can. To do some basic image editing, click on the pencil.
Clicking on the pencil will open an image editor that allows you to do some minor touchups and add text over your image. Once you’ve applied your edits, just click the “Save” button in the upper right corner of the editor and your custom thumbnail will update. (Again, it may take a little time to process.)
If you decide that you want to revert to the original thumbnail (but keep the custom thumbnail in case you change your mind), you can click the check mark next to “Use Custom Thumbnail” to uncheck that option.

Adding a Caption (or Video Description)
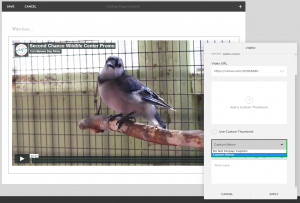
If you want to display a caption below your video, click on the field that says “Do Not Display Caption” and select “Caption Below” from the drop-down menu.
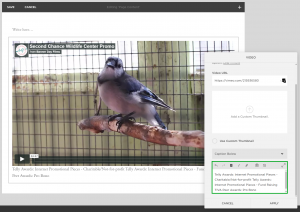
If the video has an accompanying description and the video hosting service supports it, the video description will pre-populate in the field below and you can make any edits to the text that’d like (up to and including erasing it and writing your own).
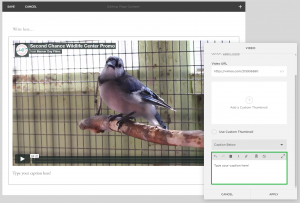
If the video description does not pre-populate, the field will say “Write here…” and you can write your own caption, which will then show up below the video player.
Once you have everything set the way you’d like it to display, click “Apply” in the Video Block Editor and the video will be published to you page! (And don’t forget to also click “Save” in the upper left of the main content area!)
Making Changes
If you’d like to make further changes, just hover over the video player and click on “EDIT” in the bar at the top. To delete your video, do click on the trash can.

Once you’ve saved all the changes to the webpage, your video should look something like this…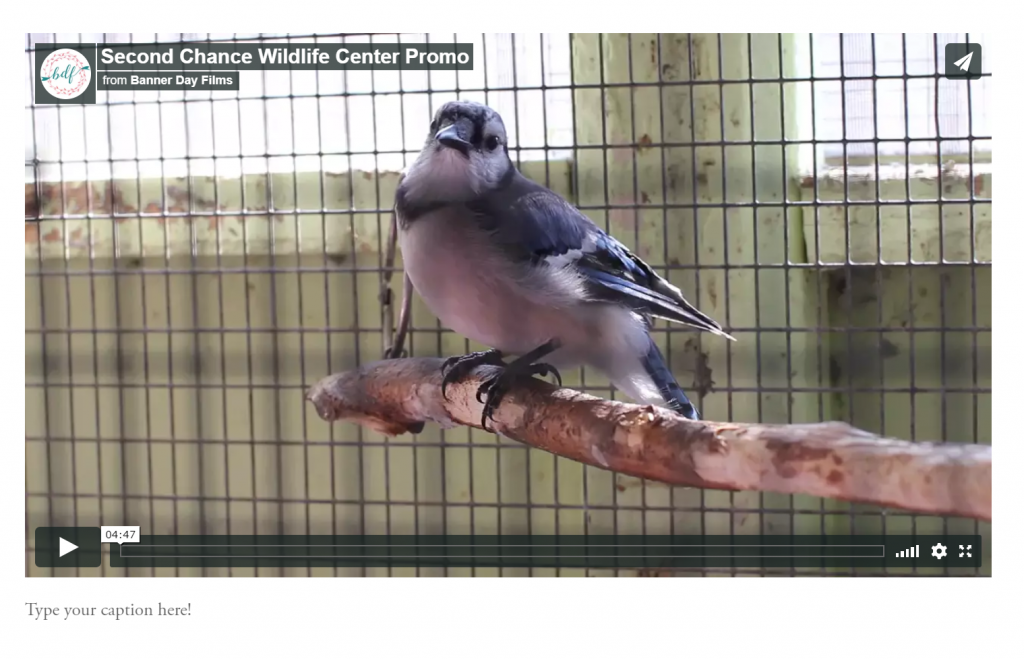
If you’d like to learn more about customizing the video player or embedding videos into your website’s banner or page backgrounds, you can find information on how to do those things at the Squarespace Support Center.
Adding Video on other Platforms (Weebly, Wix, & Self-hosted sites)
Most sites make it very easy to paste a video link into a media box and magically have a video show up. If your site does not (or you’d like to utilize custom embed options, you’ll need to use the embed code given by the content delivery network.
The minute you use the word ‘code’ in reference to a website, everyone freaks out. Calm down. We’re just doing some copy and paste here, and nothing you do can break your site. Worst case scenario, if you do it wrong…the video won’t show up.
Finding the Embed Code
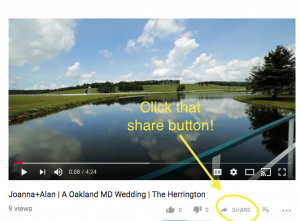
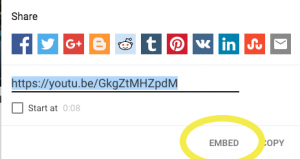
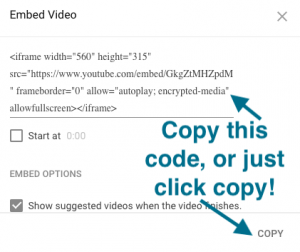
On YouTube, you’ll find the Share option right underneath the video. Click that, click embed, copy code.
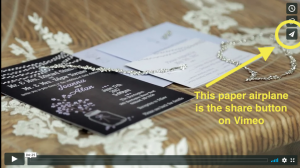
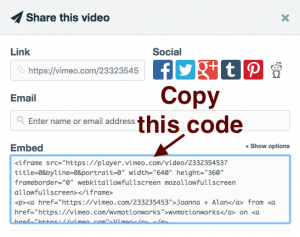
On Vimeo, it’s much the same process. The share button is a cute little airplane. Click the airplane, click in the box with the embed code, and copy it!
Add Videos to Your Website
Now you have all the tools you need to add video to your website! If you get stuck along the way, just send a message or leave a comment! If you’d like to get instructional content like this right in your inbox, join the 304 Collective email list.


Leave A Comment
You must be logged in to post a comment.